MacOS Dev Environment Setup
Today, I am going to share with you guys my development environment which has been serving me really well for the past year. By all means, mine is not that special or anything but I want to share because there might be people out there who might find this interesting, and for me to have a source that I could come back to every time I install Parallels 😂
Parallelsis a piece of software that lets you runWindowson aMac. They’re doing a very good job but I just don’t like installingVMson my machine. We haveDockersnow you know?! tldr; I’ve had not so good experiences withParallels
Now, if you’re a developer, or developer-to-be and wants to setup your Macbook for development, I’ll pick you up right here after you’re finishing Setup your Mac for first use.
I use https://sourabhbajaj.com/mac-setup/ as my reference but mine is more concentrated on
JavaScript Dev. Please check out this guide for System Preferences related setup.
1. Install Xcode
Quick tip: you can start setting up your System Preferences when you’re waiting for
Xcodeto finish installed.
- Open
AppStoreand installXcode - After
Xcodefinishes, open yourTerminaland run the following command which will installXcode Command Line Toolswhich is required for many other tools, especiallyHomebrew
xcode-select --install
2. Homebrew
Next, we’ll install Homebrew. Homebrew is like npm but for your systems rather than your JS applications. With Homebrew, you can install all kind of tools/applications and manages them in one place. Open your Terminal and run the following command:
/usr/bin/ruby -e "$(curl -fsSL https://raw.githubusercontent.com/Homebrew/install/master/install)"
After the process is finished, you can run brew doctor in the same terminal to check if “your system is ready to brew”. Once you’re “ready”, let’s run:
brew tap caskroom/cask
Following are some most used Homebrew commands that you’ll probably use:
- To search for a package (or Formulae or Cask in
Homebrewvocabulary):
brew search search_phrase
- To install a formulae:
brew install formulae_name
- To install a cask:
brew cask install cask_name
 using Homebrew to search for VS Code
the little ✅ next to the cask annotates that this cask is already installed on my machine.
3. iTerm2 & Alfred
With Homebrew installed, you should start installing two things: iTerm2 and Alfred 4
brew cask install iterm2
brew cask install alfred
Run iTerm2 and start setting a couple of things up. The following items are all optional
- Go to
Preferences -> Profiles -> Keys, and add new 4 shortcuts:
| shortcut | action | esc+ |
|---|---|---|
| ⌘← | Send Escape Sequence | OH |
| ⌘→ | Send Escape Sequence | OF |
| ⌥← | Send Escape Sequence | b |
| ⌥→ | Send Escape Sequence | f |
- Go to
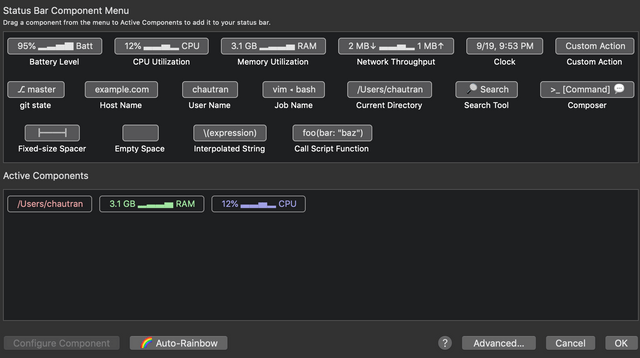
Preferences -> Profiles -> Session, and checkStatus bar enabledand configure them how you want. I personally have:Current Directory,CPU UtilizationandMemory Utilization
- If you want to change your typography, go to
Preferences -> Profiles -> Text. I useMenlo 14pt. - Finally, browse to iTerm2-Color-Schemes to pick a theme that you like. Then go to
Preferences -> Profiles -> Colors, import the preset that you picked and select it. I personally useDracula
Next up is Alfred 4. Alfred is Spotlight replacement and if you’re willing to pay (which you should) for the Power Pack, you’ll never live your life normally without Alfred. First of all, we need to disable Spotlight.
- Run
Spotlightand uncheck everything that you don’t want. I uncheckFonts,Imagesand such. - Click on
Keyboard Shortcutsand uncheckShow Spotlight Search. While you’re here, click onServices, look forSearch man Page Index in Terminaland uncheck that as well. I will explain later. - Run
Alfred. CheckLaunch Alfred at loginand change yourAlfred Hotkeyto⌘ Space. Then you’re all set.
4. zsh and oh-my-zsh
One of the reasons why iTerm2 is so much more powerful than Terminal is that you can customize it. There are many different frameworks that can make your iTerm2 experience up another level. Personally, I always go with zsh and oh-my-zsh because of how well-known it is, easy to look for answers you know 😋. To install zsh, we’ll use Homebrew.
brew install zsh
After that’s done, run the following command to install oh-my-zsh:
sh -c "$(curl -fsSL https://raw.githubusercontent.com/robbyrussell/oh-my-zsh/master/tools/install.sh)"
Now you have the power of oh-my-zsh in your iTerm2. Your main configuration file will be ~/.zshrc instead of ~/.bash_profile or ~/.bashrc. We’ll start setting up oh-my-zsh with some productivity stuffs.
- By default,
zshprovides analiasto quickly open~/.zshrcfrom the terminal. However, you might want to install your favorite text editor before doing so. I usually installnvimandvscodeat this point.
brew install nvim
brew cask install visual-studio-code
nvim feels easier to me and VSCode has that code command that you can open VSCode from the terminal. Go ahead and execute:
nvim ~/.zshrc
You can use
codeif you want to. Ifcodeis not available, runVisual Studio Code-> Open theCommand Palette->Shell Command: install 'code' command in PATH
aliasis your shortcut to any shell/combinations of shell -
Let’s setup some aliases to make your life easier. The following list is my current aliases which I find super helpful.
# change to code if you use vscode
alias zshconfig="nvim ~/.zshrc"
# you need to source zshrc after you make change like adding plugins
alias zshsource="source ~/.zshrc"
# quickly open oh-my-zsh config
alias ohmyzsh="code ~/.oh-my-zsh"
# best alias ever
alias c="clear"

alias rm="rm -rf"
alias ls="ls -lah"
alias cd..="cd .."

# find node_modules recursively from the current dir
alias findnode="find . -name "node_modules" -type d -prune -print | xargs du -chs"
# remove those node_modules
alias rmnode="find . -name 'node_modules' -type d -prune -print -exec rm -rf '{}' \;"

# if you develop iOS app, this will list all available simulators
alias listios="xcrun simctl list devices"

# CLI Alias
alias cra="create-react-app"
alias crl="create-react-library"
alias rn="react-native"
If you’re from ~/.bash_profile or ~/.bashrc, you’ll need to add the next line to your ~/.zshrc
# If you come from bash you might have to change your $PATH.
export PATH=$HOME/bin:/usr/local/bin:$PATH
# extraneous stuffs
export CLICOLOR=1
export LC_ALL=en_US.UTF-8
- Theming: You can go to Themes and pick a theme you like. Then edit the following line
ZSH_THEME="theme_name"
-
Plugins. By default,
zshcomes with various plugins and will enablegitplugin by default.gitplugin provides you with all kinds ofgitshortcuts. Check this link out. I have the following plugins enabled.colored-man-pages: comes withzshcolorize: comes withzshzsh-syntax-highlighting: INSTALL.mdzsh-autosuggestions: INSTALL.mdzsh-completions: INSTALL.md
Now that we have setup our terminal, it’s time to start installing some applications. Use brew search to search for an app that you want.
brew cask install google-chrome
brew cask install appcleaner
brew cask install postman
5. NodeJS
There are many ways to install NodeJS but I’d recommend using nvm to manage NodeJS on your machine. nvm stands for Node Version Manager and it allows you to install and switch between versions very easily.
- Install
nvm
curl -o- https://raw.githubusercontent.com/creationix/nvm/v0.31.1/install.sh | bash
- Run
zshsource - Run
command -v nvmto check ifnvmis available. If you have issue, it’s most likely thatnvmis missing in yourPATH. Fix by adding the following block to your~/.zshrc
export NVM_DIR="$HOME/.nvm"
[ -s "$NVM_DIR/nvm.sh" ] && \. "$NVM_DIR/nvm.sh"  # This loads nvm
[ -s "$NVM_DIR/bash_completion" ] && \. "$NVM_DIR/bash_completion"  # This loads nvm bash_completion
- Run
nvm install node. This will install the latest version ofNodeJSon your machine. - Run
nvm lsto list installedNodeversions. - Run
nvm ls-remoteto listNodeversions that you can install
6. Python
Even though I don’t use Python as a programming language, but some tools are built with Python. So I’d also recommend installing Python using pyenv (just like nvm for NodeJS).
- Install
pyenv
brew install pyenv
- Update
PATH
echo 'eval "$(pyenv init -)"' >> ~/.zshrc
- Run
pyenv install --list. If you have issue here, restart your terminal. - Run
pyenv install version_hereto installPython. I usually install latest 2.x and latest 3.x
7, Database
Again, consult https://sourabhbajaj.com/mac-setup/ and pick the ones that are relevant to you.
8. Docker
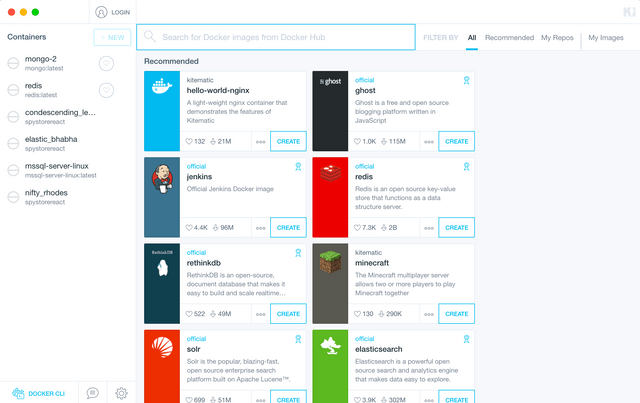
Docker can be installed by visiting this link. If you like GUI, I’d recommend Kitematic which is awesome.
brew cask install kitematic
9. MongoDB
I use Docker for my local MongoDB instance. However, I recently had to install Mongo client on my machine due to some work that requires some CLIs from Mongo. Visit this link and follow the manual to install Mongo locally.
Again, I like GUI because it saves a lot of times and there are many Mongo GUI Client out there for you to choose: Studio 3T 💰, NoSQL Booster 💰 or Mongo Compass 🆓 and Robo 3T 🆓. I personally like NoSQL Booster (they also have free version) because of their focus on Shell commands and provides extremely good intellisense.
10. Jetbrains
I am a Jetbrains fan. Jetbrains is a suite of well-known IDEs like IntelliJ, Webstorm, PyCharm, PHPStorm, Android Studio ..etc… Only thing to note here is if you use Jetbrains, consider installing their toolbox Jetbrains Toolbox and it’s available via Homebrew
brew cask install jetbrains-toolbox
Jetbrains Toolbox allows you to manage your IDEs installation and versions. It also allows you to install certain shell commands so you can open your IDEs from the terminal.
That is all I have to share for Development Environment Setup. I hope you find the information helpful. My next blob will probably be on Jetbrains specific so I can share my productivity tips with you through the tools that we use everyday. Go and be productive, and make sure to always install things with Homebrew whenever possible. Thanks for reading 😀.
⏫⏫⏫⏫
Written by Chau Tran

